
 for Excel
Install the add-in
ZAG works as an Excel add-in. You can start using it in the three steps below.
(The install file contains no confidential or personal information, and it is the same for every user.) 日本語版はこちら
STEP 1Download the install file
Save it somewhere easy to find, such as your desktop — you will use it in the next step.
The file is the same for everyone, so feel free to forward it to colleagues.
STEP 2Add it to Excel
Excel online (recommended)
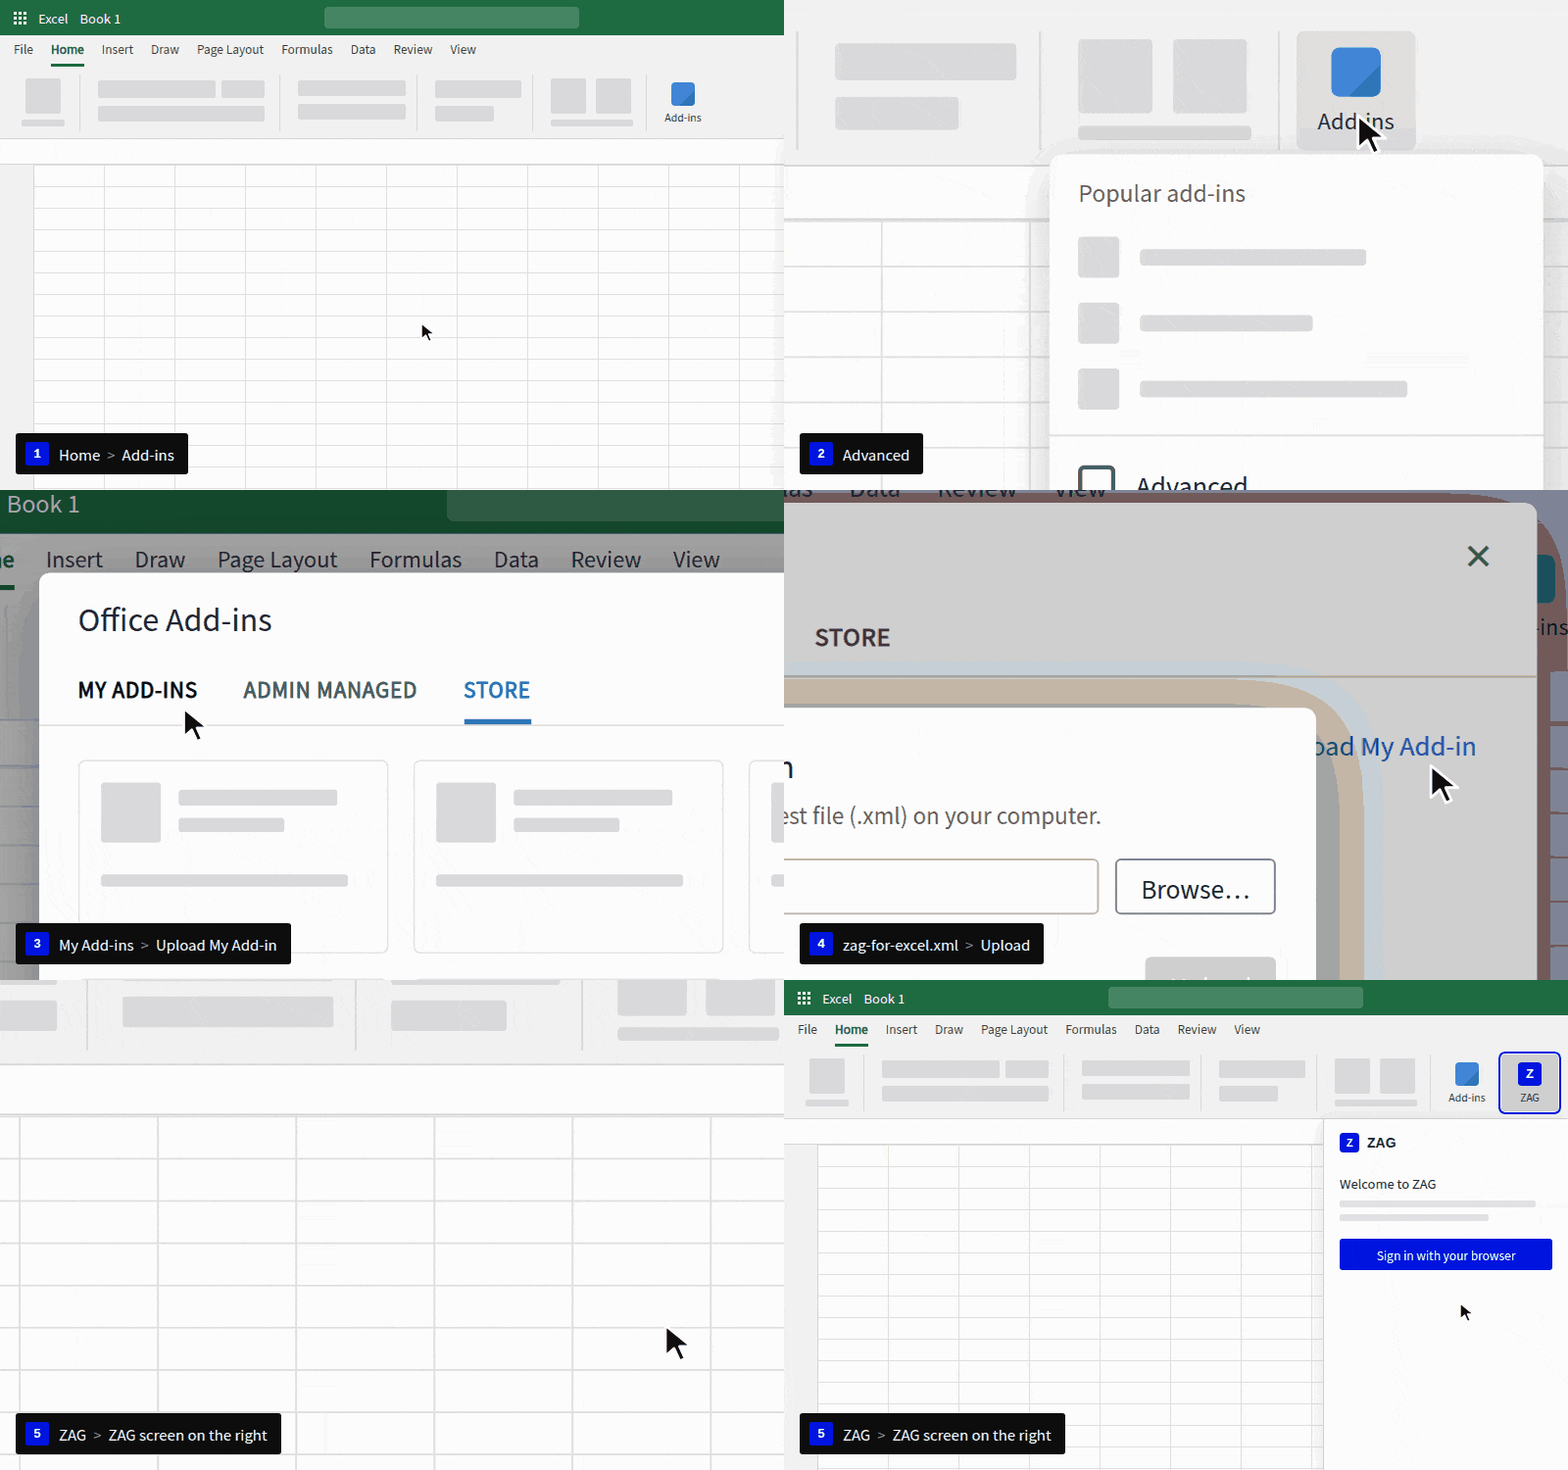
- Sign in to Excel online (https://excel.cloud.microsoft/) and open the file you want to work on.
- Click the “Home” tab > “Add-ins” > “Advanced”.
- Click the “My Add-ins” tab > “Upload My Add-in”.
- Select the downloaded zag-for-excel.xml and upload it.
- ZAG appears in the menu. Click it and the ZAG screen opens on the right side of your screen.
About desktop Excel
Installing in the desktop app is more involved, so we recommend the online version.
To use or roll out the desktop version across your organisation, please ask your organisation's Microsoft 365 administrator.
STEP 3Sign in and set up your organisation
In the ZAG screen on the right, choose “Sign in with your browser”.
(You can sign in securely with a Microsoft or Google account.)
The first time you sign in only, set up your organisation:
- The first person at your company:
choose “Create an organisation” (the creator becomes its administrator). - Everyone after that (colleagues):
choose “Join” the existing organisation, so you share the same templates.
Your organisation's data is tied to your account, so always sign in with the same account.